Hill House - Building a Passive House Part 2; Design Software
This new 3 bedroom family dwelling has been designed to meet the rigorous Passive House (Passivhaus) standards in order to provide a cost effective new dwelling to construct, run and maintain.
As Passive House designers, we use Passive House Software; PHPP (Passive House Planning Package) which is a specialised Excel spreadsheet used to check if our building design meets the Passive House criteria.
PHPP is a comprehensive energy modelling software specifically designed for all types of Passive House buildings and it allows us to calculate and optimise the energy performance of a building to meet Passivhaus standards.
PHPP is a design tool that takes into account various factors such as insulation, airtightness, ventilation, and solar gains to predict a building's energy consumption. It allows us to make informed decisions about building components and systems to achieve ultra-low energy buildings.
It's an essential tool for Passive House certification, providing accurate energy calculations required for the certification process.
By using PHPP, we can ensure that our buildings will perform as intended, maintaining comfortable indoor temperatures with minimal energy input - a key principle of Passive House design.
PHPP Key Features:
• Calculating energy balances
• Designing comfortable ventilation
• Calculating the heat load
• Summer comfort calculations
• Other useful tools for the reliable design of Passive House dwellings
designPH is a 3D modelling tool specifically designed for Passive House planning and certification. It works as a plugin for SketchUp, a popular 3D modelling software used by architects and designers and it integrates with the Passive House Planning Package (PHPP) to streamline the design and certification process.
The major benefit of using designPH is to generate a simplified 3D model that can be directly transferred to the PHPP spreadsheet, eliminating the need for manual data entry - a huge timesaver!
The software helps in the early design stages of Passive House projects by allowing quick energy balance calculations and optimisation of building geometry in a real-time simulated 3D environment.
The designPH plugin helps visualise and analyse factors crucial for Passive House design, such as solar gains, shading, and thermal envelope.
The plugin offers functionality to designate surfaces as part of the thermal envelope, shading elements, or treated floor area. It enables users to choose building systems from a list of certified components or create custom ones. Similarly, windows can be selected from a pre-approved list or customised with user-defined data for non-certified units. Essentially, the plugin captures all the data associated with the model elements, which is then seamlessly transferred to PHPP for further analysis.
This software is part of the specialised tools that Passive House designers use to ensure their designs meet the strict energy efficiency standards required for certification.

designPH Key Features:
• Project data input and 3D display of the building envelope
• Automatic analysis and simplified calculation of the heating demand
• 3D editing and optimisation of the building design
• Geometrical data of the building envelope can be exported into PHPP
The first step in designPH is to define the complete thermal envelope, which includes the floor, roof, and walls. Each wall component is created as a separate face and then grouped to allow for easy modification.
Every surface is categorised as either floor, roof, or wall, which determines its surface transmittance values. It's then assigned a U-value group from either certified systems or user-defined options.
Windows are incorporated into these faces using the plugin's window tool.
The thermal envelope is defined as the outer surface of the insulation layer.
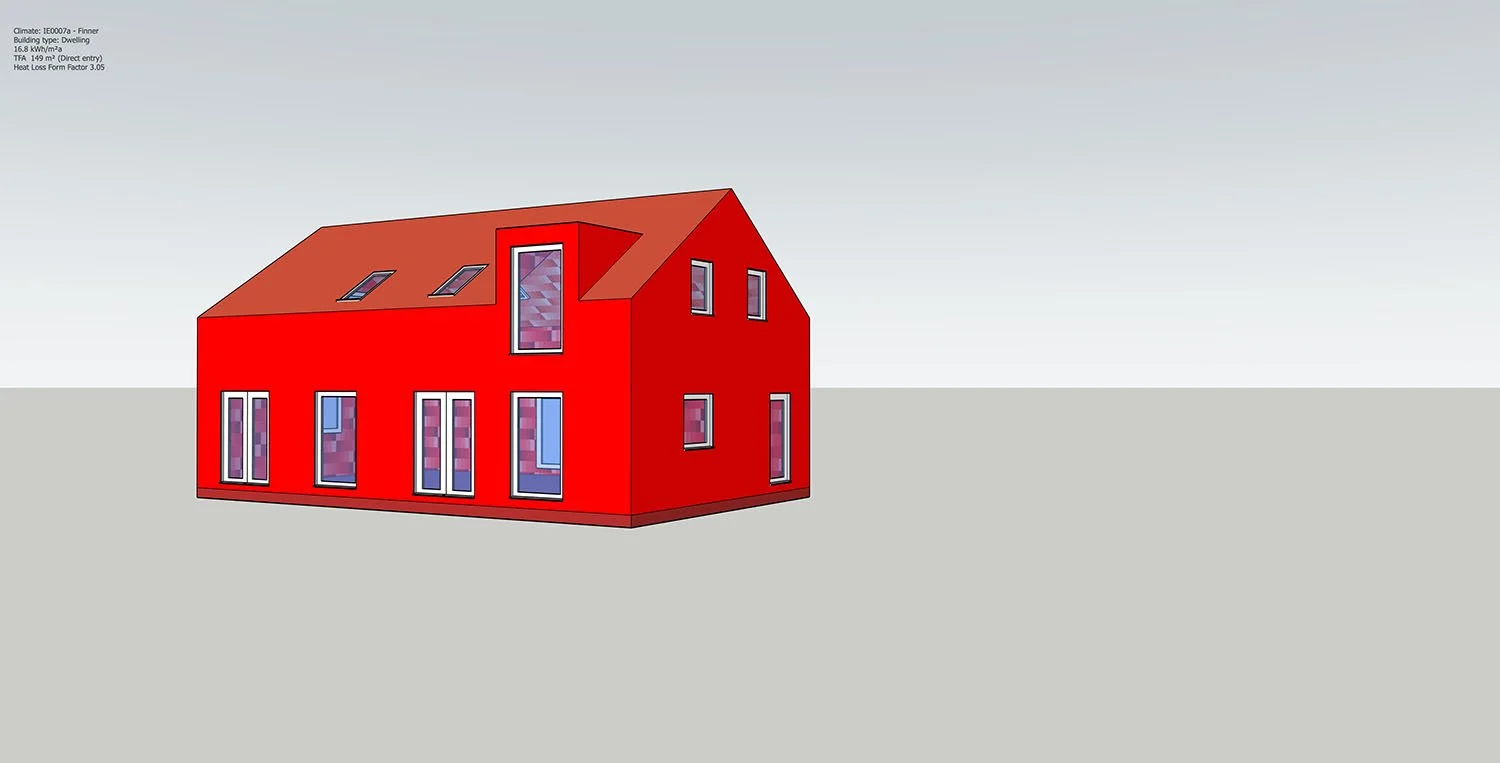
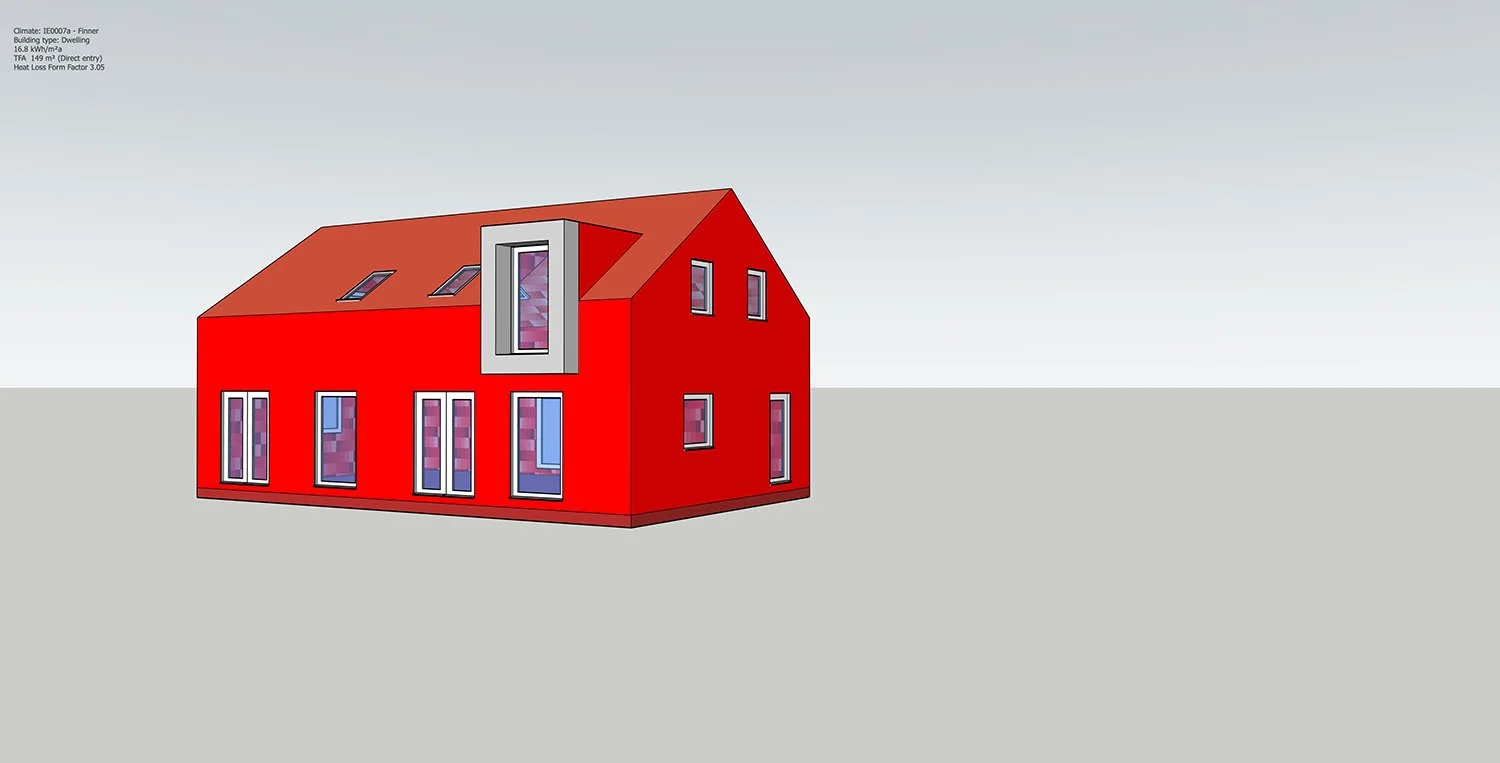
In our design, we have incorporated a ventilated timber cladding layer on the exterior, along with a feature dormer window surround. The dormer window surround elements is modelled independently as a shading component and classified as non-thermal element - shown in white in the image below.
This ensures it won’t affect the overall energy balance, except for their shading impact on the dormer window. We have not included the timber cladding as a separate non-thermal element as the window reveals are accounted for when we added the window components to the model.
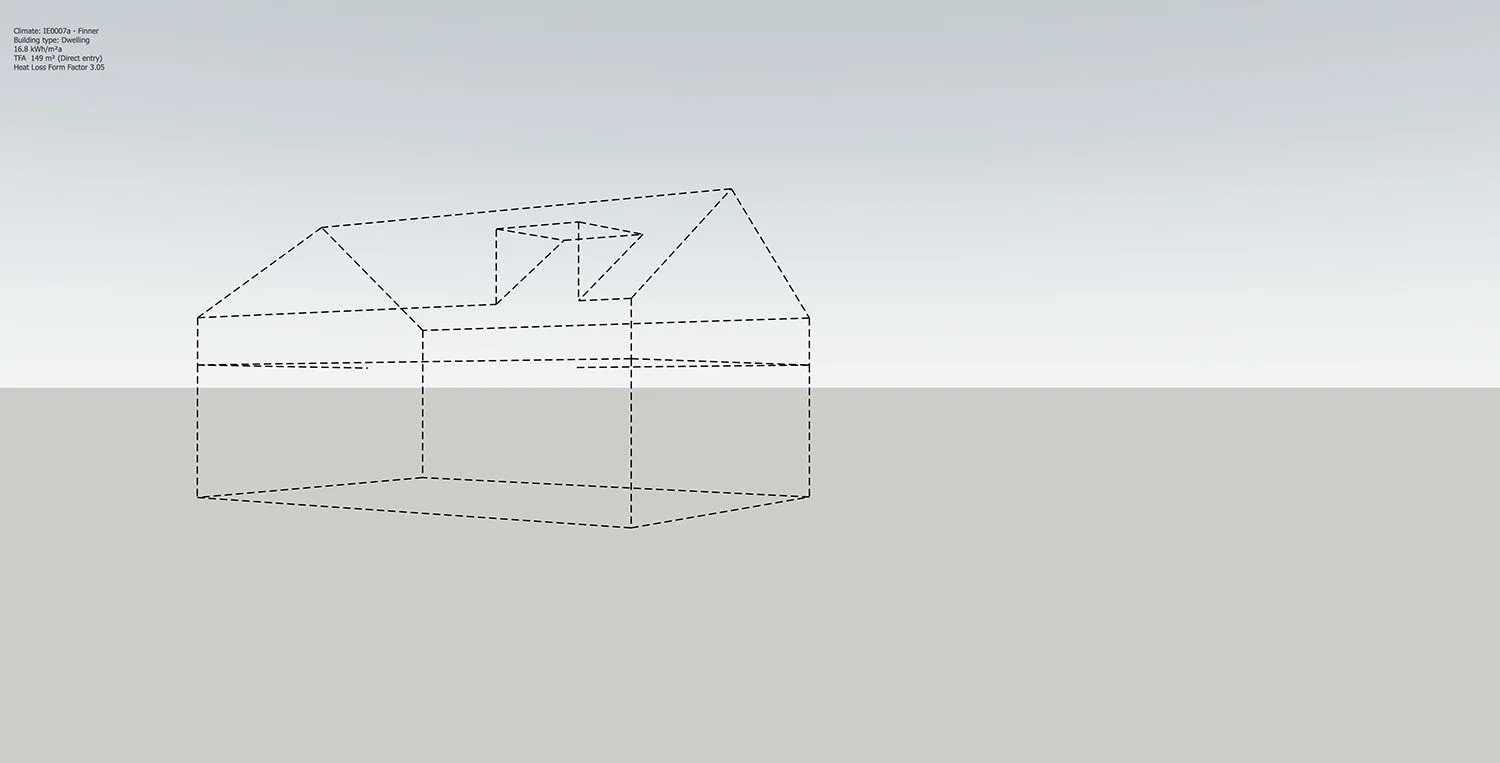
The software then allows for the creation of lines representing various thermal bridges within the building. These lines are categorised into thermal bridge groups and imported into PHPP as lengths and shown by the dashed lines in the image below.
Psi values from thermal bridge analysis can then be applied to these lengths. By default, PHPP assumes psi values of 0.04.
For a structure to be considered thermal bridge free, these values should be 0.01 or less. In many instances, well-designed details can perform even better, making it worthwhile to invest extra effort in accurate modelling.
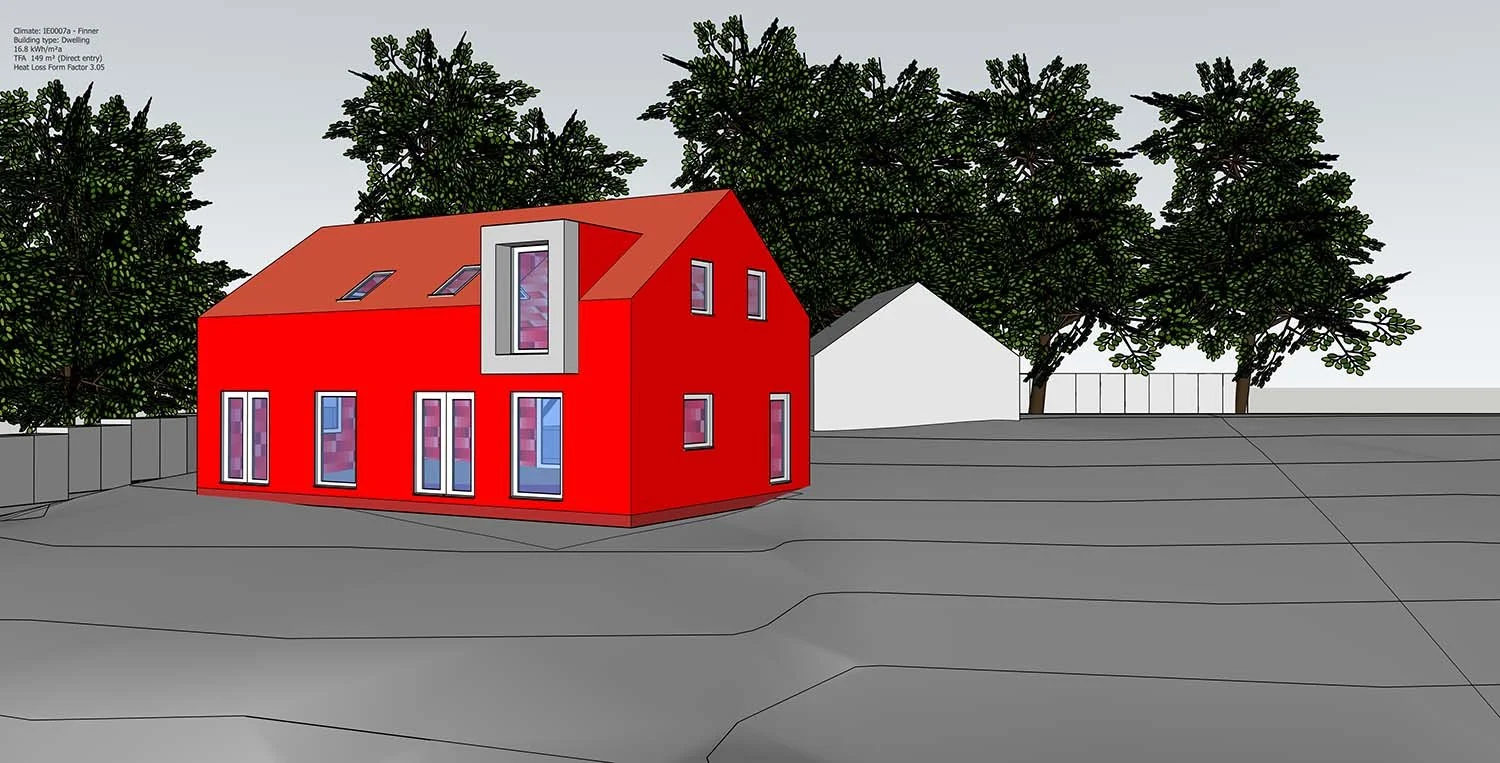
Lastly, the software allows for the insertion of surrounding elements such as adjacent buildings, trees, and topography lines to model their shading effects - as shown in the image below.
In our project, we modelled the garage, which is situated to the north-east, as well as the hedge and mature trees at the site's boundary.
We also included the hill located to the south of the site. We found that in our specific case, the combination of all these shading elements significantly influences the solar gains from the windows.
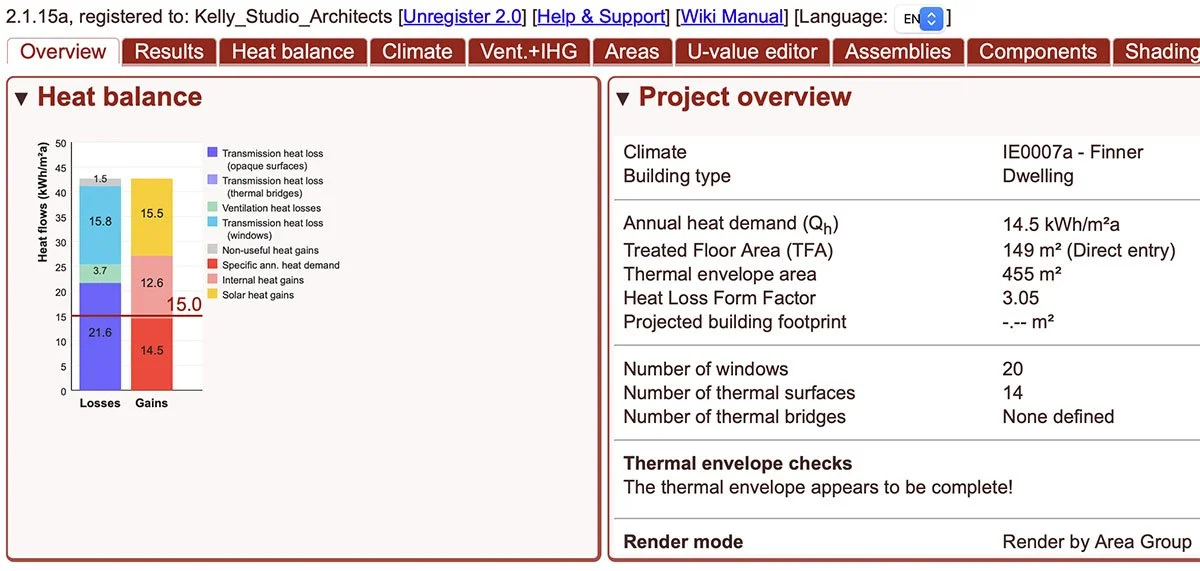
Upon completion of all modelling, the plugin provides an initial evaluation of the energy balance.
This preliminary assessment incorporates several assumptions, such as a ventilation system with 75% efficiency, default thermal bridge values, and standard window installation psi values. As such, it serves as a guide rather than a definitive result.
If your initial results are near the 15kWh/m²a target, you're likely to meet the criteria once the data is refined in PHPP.
In our specific case, the plugin initially calculated a value of 14.5kWh/m²a,